When doing projects with Arduino or Lilypad, it would be fun if the Arduino could play audio clips. Let’s try to add speaker and play some sounds.
First we need to add the PCM – library to the Arduino development environment. Use the Arduino Library Manager and search “PCM”.


Then after the Library is installed, go to the examples, and find the “PCM Playback” example project.

The project uses Arduino Timer to produce the sound signal, from the output pin D11. If you are using Lilypad, the avr-chip used on those boards might differ from other arduino boards. Then you might be need to look for a different solution, and use Timer3 for the PCM-signal creation.
Let’s test first with the Arduino NANO, how the is the playback possible by using a small speaker.

Audio Clips needs to be converted to numerical values, so that those can be stored into the Arduino’s program memory. Audacity or similar program for audio files creation can be used to save the audio files to correct format.

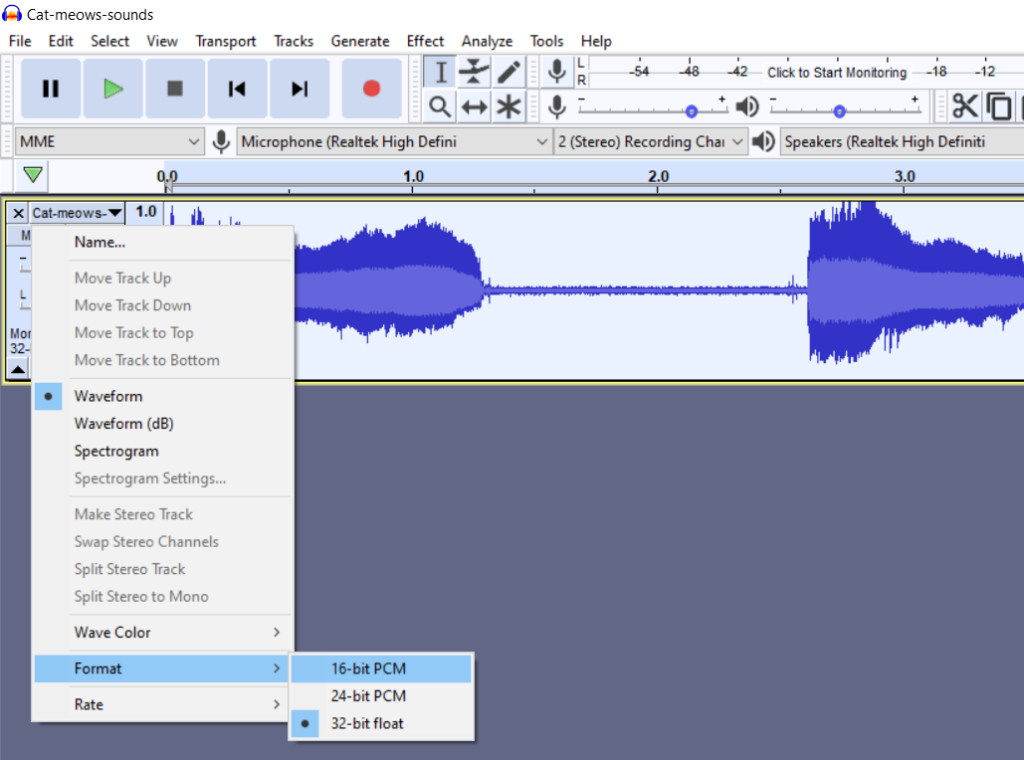
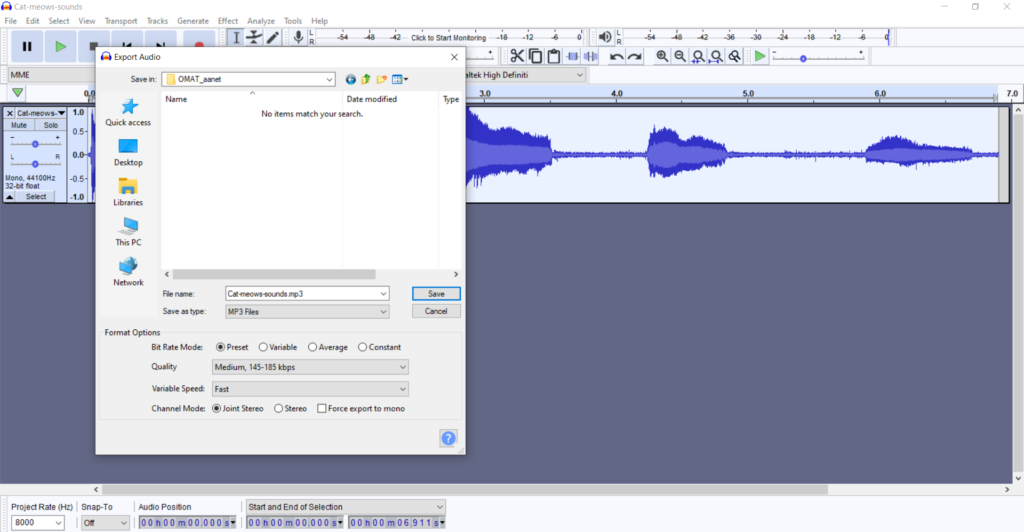
Use mono and 16-bit PCM when saving the audio clips. And limit the max Project Rate frequency to 8000, so the clip files will be smaller in size, and use less memory on the Arduino.

Then export the audio project file to correct format, for example save it to .mp3 files first, and then use the converter program to convert the .mp3 files into numerical hex values.

Then use the “Encode-Audio program” to convert the audio file to numerical form.


Now the numerical audio data, can be copied into the Arduino development audio test project.

What’s Happening i am new to this, I stumbled upon this Ive found It absolutely helpful and it has helped me out loads. I hope to contribute & assist other users like its helped me. Great job.